Do you like and edgy or vintage look for your style? Ripped jeans are just for you! Seriously though, ripped jeans are a very fashion forward and bold way to present yourself. But we can’t all afford pre-distressed designer jeans, or maybe some of us are creative and want to customize our own look, or maybe we have an old boring pair of jeans around we want to breathe new life into.
If any of these are the case, you’ll need to know how to distress and rip jeans yourself. Good thing you found this handy article. With these tips, you’ll be rocking exactly the type of jeans you want. Also, a friendly hint, these distressing techniques also work for denim jackets, if a well-worn denim jacket is your thing.
Basic Rules for Distressing Jeans
The first thing to know about ripped jeans is when to wear them. They are edgy, fashion-forward pants, and they are also casual. Unless you work in the fashion industry, which most of us don’t, keep the distressed jeans with a casual outfit in a casual setting.
The next and quite vital thing to remember when ripping your own jeans is that less is more. You don’t need 15 rips in your jeans or 6-inch holes at the knees to pull off the look. In fact, you’ll definitely be overdoing it. Not only that, making all those tears yourself and keeping the jeans wearable is difficult to do. So keep the distressing reasonably simple.
The last tip to follow is to use light colored denim. You can pull of off ripped denim in a medium shade as long as it has some solid fade to it, but lighter is better. Dark jeans won’t look nearly as good when distressed if you are doing the distressing yourself.
We like to think of ourselves as quite fashion conscious, but we don’t work in the industry. For a few more tips on ripped jeans, check this article out.
Tools You Will Need to Shred Your Jeans

First and foremost, you’ll need a flat surface. Don’t try to rip your jeans while wearing them or holding them in your hand. This is a great way to cut or injure yourself, and that’s never necessary, friends.
Next, you’ll want something to put on the inside of the jeans to prevent your handiwork from spreading to the back leg of the jeans. A magazine or piece of cardboard or wood will do just fine.
You’ll need a pencil or chalk or a pen to mark where to want to distress your jeans.
To distress your jeans, sandpaper, steel wool, a cheese grater, or a pumice stone all work great. These will weaken and fade the fibers exactly how you want.
You’ll obviously need a cutting tool to make the small holes. Scissors or some sort of razor blade work great.
Lastly, tweezers can be the tool for the final touches of the look. They can loosen fabric and pull threads to give a truly worn look. Now onto the lesson of the day.
Step 1: Practice on a pair you won’t wear
The best way to ensure you will rip and distress your jeans correctly is to practice on an old pair of jeans you don’t care about. Get some denim that doesn’t matter and take all of the following steps to practice cutting and tearing and fraying to your heart’s content. This way, when you do it with your jeans you will actually wear, they will look right.
Step 2: Choose the Right Jeans
As stated before, the lighter the jeans you choose to work on, the better. They can pull off more severe tears and frays. The darker the jeans get, the less you’ll want them ripped. Lean towards slight fraying and distress with darker jeans.
Next, you want jeans that fit properly, of course. You can distress your jeans in a wonderfully artistic and trendy way, but if the jeans don’t fit well, they still won’t look good. For distressed jeans, you don’t want jeans that are too tight as this can cause your skin to bulge out of the tears. Not good. And you never want jeans that are too loose. Even if they aren’t distressed. Don’t wear baggy jeans, people.
Finally, you want jeans that already have some natural wear on them. If they are older jeans you are choosing to work on, great, no further steps needed. If you buy a new pair to rip yourself, you’ll want to wear the jeans almost constantly for a couple weeks so they break in and begin to show some areas of future natural wear and tear.
Step 3: Mark It Up
For this step, you’ll need to be wearing the jeans. This is very important to get the correct spots to work on. You want to choose spots that natural wear could happen over time. This means pockets, both front and back. Maybe the bottom hem of the jeans. And in the thighs and just above and below the knees. Above and below the knees are the only places there should be actual holes if desired. All the other spots should just have some threads or edges frayed and worn.
Take your chalk, this works better than pencil and much better than pen as it can be washed off if you change your mind, and mark the spots on your jeans where you want to do some work. Draw a small, horizontal line just below the knee or mark a spot on the thigh. Symmetry is bad here, keep your tears in uneven places and sizes across both legs.
Step 4: Begin Fraying
Take off your jeans, do a little dance, and put the buffer magazine or whatever you choose in the legs. Now, begin fraying the spots you marked. This is when you use the sandpaper, steel wool, cheese grater, or pumice stone. All of these are viable options, so use what you have. This is also where your practice on other jeans begins to show.
Start rubbing all the areas you marked with the tool. Use a moderate amount of pressure. Too little and it will take forever, too much and you’ll ruin your rip. Rub until the desired wear appears. The fibers should fade a little and begin to weaken and tear.
Step 5: Cut the Holes
If you marked spots around the knees to make a hole, this is when you cut them. You never want to cut directly on the kneecap area because you will stretch and expand that hole too much as you wear them. Cutting directly above or below the knee allows for a more gradual stretch of the hole.
Take your scissors or blade and make a small horizontal cut where you marked the jeans. Small means about half an inch to an inch, depending on how large you want the hole. After you cut the hole, use your hands or the dull part of the blade to rip the jeans even more. This gives the threads a more natural worn look rather than a clean blade cut.
And remember, less is more. Don’t make the holes too big. They will grow over time so if they start too large, they will be comically large after wearing them for a while.
Step 6: Tweezer Time
This is where you add the final touches depending on your own taste. Use tweezers to pull at or remove exposed threads. The more you fray, the more worn they will look. You don’t want a bunch of long, loose threads hanging around your distressed or ripped areas, but some shorter loose threads can look very good.
Step 7: Wash and Dry
The final step to complete the look is to wash and dry your jeans. This will wear your tears and cuts even more and make the work you just did look more natural than man-made. This is definitely a good thing because the look itself says you don’t care enough to have fully threaded pants. You can wash and dry twice if the first cycle doesn’t distress the distressing enough.
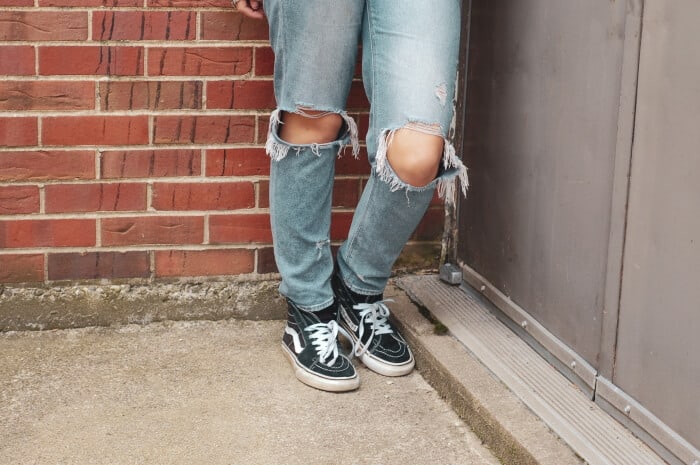
Step 8: Confidence
I know we’ve said this a million times on this site, but no look is complete without the confidence to rock it. If you are wearing ripped jeans, this means you don’t care if anyone thinks you look classless or immature. You know these jeans are stylish and that you wear them in the best way. Plus, you put in the work to make them this badass. So wear them with confidence. Always.

